Support
Find help and resources for the ChatGPT Add-in for Outlook. How to install, plus documentation, tutorials, or other support, see below.
Frequently Asked Questions
Yes, it works for both. Outlook must be used with a Microsoft email account to be able to install AppSource add-ins. Please see below for more information on installing.
Yes. When creating prompts (configurations) you can define whether it is helping you compose or read emails. In ‘Edit Configuration’, see ‘Read mode’ and ‘Compose mode’ options.
No. We don’t charge for using our free tool. You connect an OpenAI account to utilise ChatGPT features and any costs are with OpenAI.
You need an account for OpenAI API to use with the add-in, not a ChatGPT Plus subscription. These are billed separately. The API has its own pricing, which can be found at openai.com/pricing.
Currently, OpenAI apply a separate cost for API usage. The API has its own pricing, which can be found at openai.com/pricing.
Because we hope you like it enough to ask for a custom version to be made for your specific needs. Blueberry can create a version of the Add-in for customers wanting their own custom prompts for their 365 domains, as well as develop a version of the Add-in that customers can resell, featuring their own unique prompts.
There are certain requirements for running Outlook add-ins. You can read more about compatibility here: Outlook add-in requirements
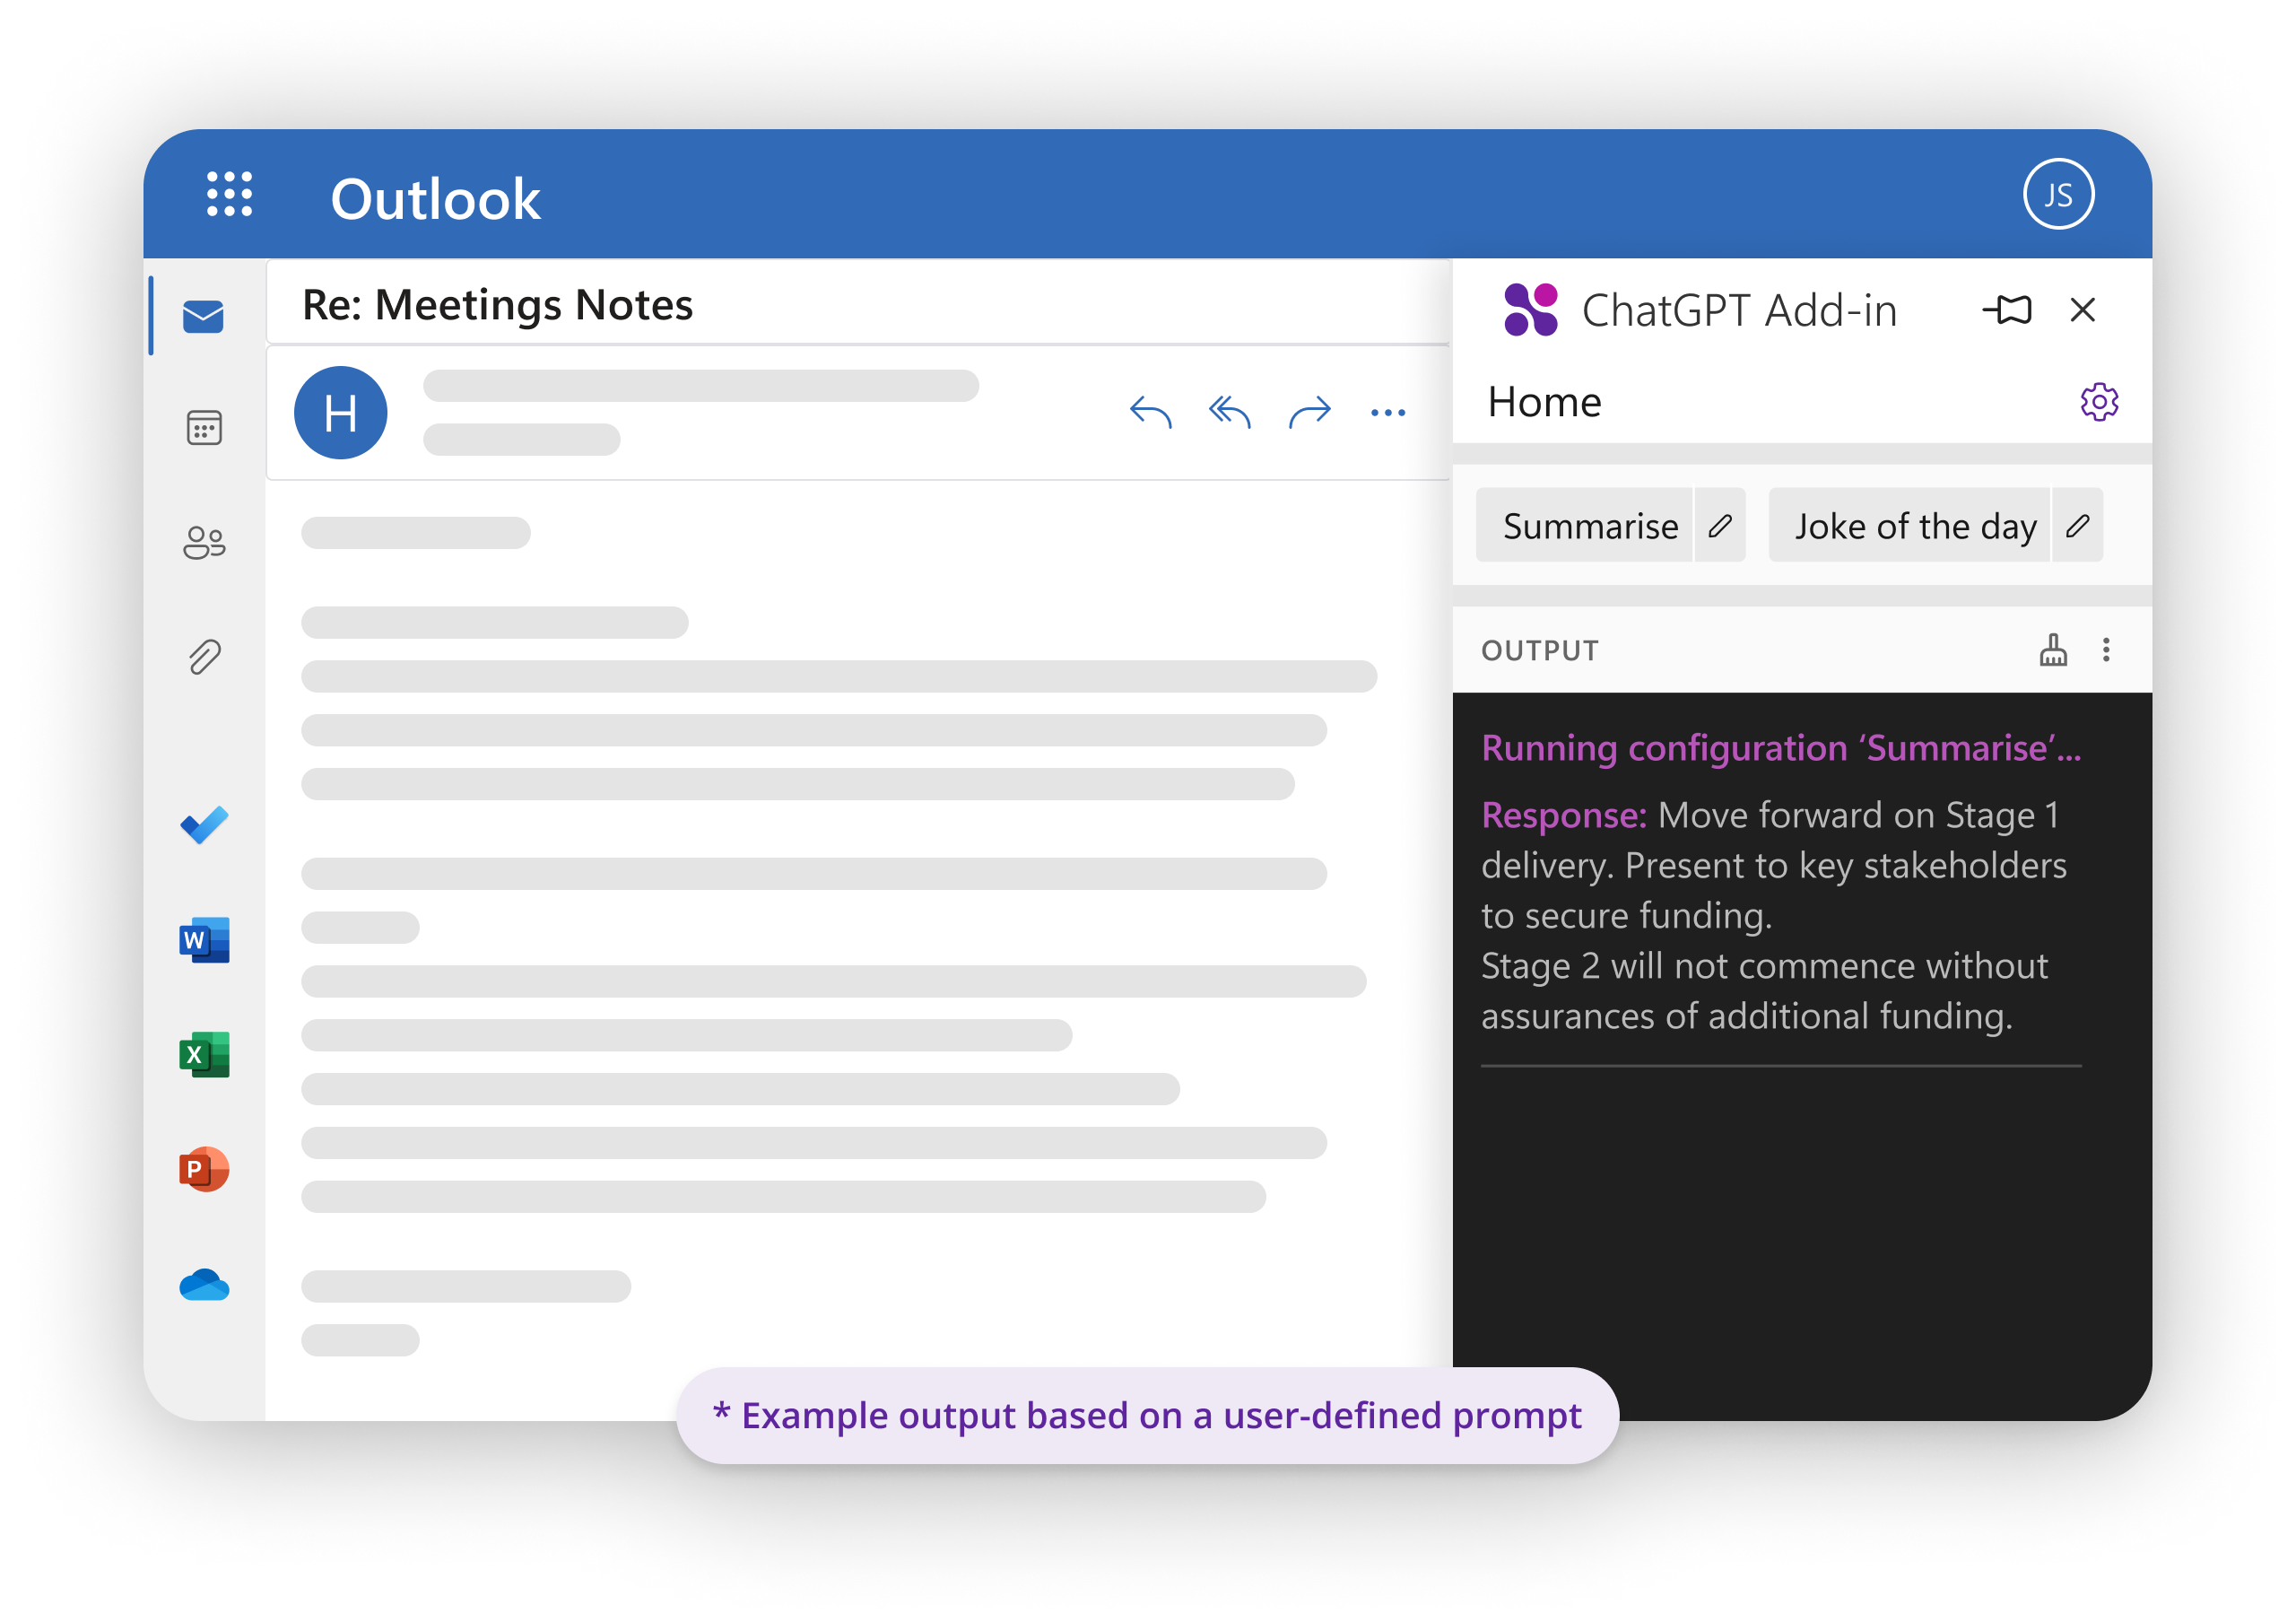
The installed add-in will appear alongside other add-ins in the Outlook ribbon. Starting the Add-in will open a panel on the right. The output is shown in this separate panel to the right of the original email. When composing an email, it can be configured to write to an email or you can manually copy and paste from the output into your email.
Yes. The Add-in can manage multiple configurations for different types of emails or scenarios – with each configuration having its own set of conditions, prompts, and display preferences. And you can auto run and/or manually trigger multiple configurations per email.
Yes. A few sample prompts to help get you started. You can also use a sample configuration as a starting point and make your own using ‘Copy and edit’ option (available in the Configurations page).
ChatGPT Outlook Add-in is an experimental tool that allows users to configure custom prompts (configurations) to run ChatGPT on selected email or new email. We’d ideally like people to use the ChatGPT Outlook Add-in to experiment with using different prompts – be as creative as they want and see what they can do with it. And if you create a really useful configuration, we’d love to see what you’re doing with it!
Your API key is the most likely problem. Check that it has been correctly entered and check your OpenAI account too. For extra information, you can ‘Enable debugging mode’ in ‘Settings’, this will provide you with extra information. And, if you’re still struggling, you can send this debug output to us and we will try to help you.
Yes. We currently support the following models and additional models are periodically being added: gpt-3.5-turbo, gpt-4, gpt-4-turbo and GPT-4o. You can set different models to be used in different configurations.
When error codes are returned from OpenAI this tells you that there is likely a problem with your account, or its limits and you are trying to process too much within those limits. You can find out more information about the OpenAI API error codes at https://help.openai.com/en/articles/6891839-api-error-codes
This is commonly due to account quota and rate limit issues and there are different reasons including the specific model being used, the prompt you’re running and length of email your running that against. Often, this means you submitted too many tokens or requests in a short period of time and so have exceeded the number of requests allowed for your OpenAI account, resulting in their services temporarily blocking you from sending more. Wait, then try a simpler prompt that will use less tokens, e.g. ‘Joke of the day’; set configuration to use a recent model – allows higher token usage (be aware cost may increase); check account quota and budget settings. Read more: Error Code 429
The API requests are sent directly to OpenAI. And we don’t store any data sent through the API request.
You can read more here about the OpenAI API Data Privacy: https://openai.com/api-data-privacy
We believe so. But many people can’t wait – or want to experiment with their own prompts. We decided to create a tool to let them experiment and harness the full power of this technology.
If you have a question that isn’t answered on this support page, please email us at support@chatgptoutlookaddin.com
Installing the Add-in
- Open Outlook and look for the Add-ins page. To do so, click on option Home > Get Add-Ins from the ribbon. If the Simplified Ribbon is configured in your Outlook client, select the ellipsis button (...) from the ribbon, and then choose Get Add-ins.
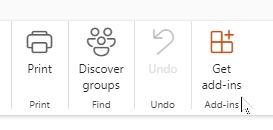
Note – the option may not be visible until you start reading an email.
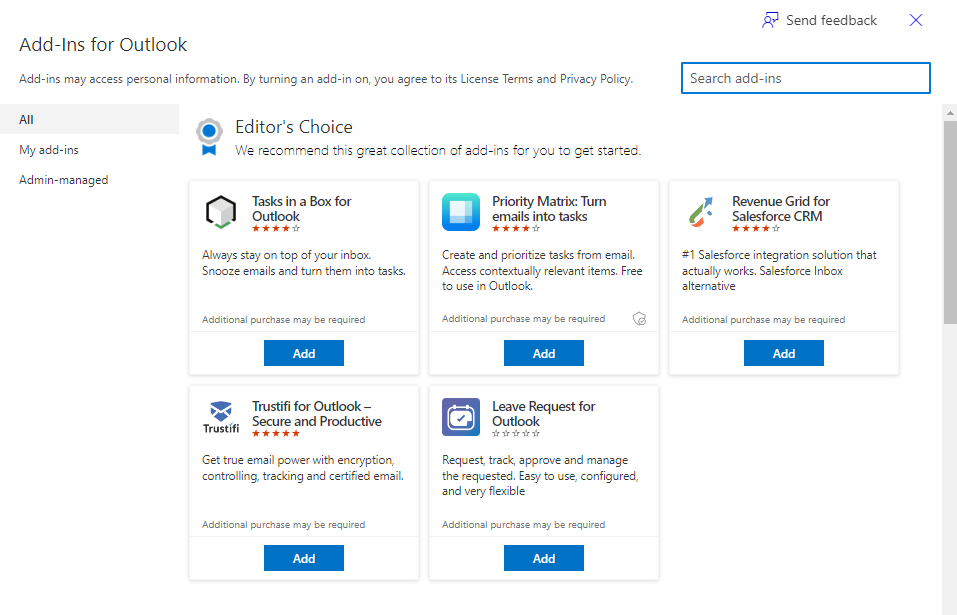
If you cannot find the Add-ins page, please follow the platform-specific instructions below.
IF USING OUTLOOK FOR WINDOWS
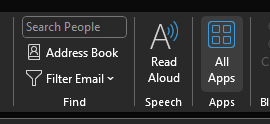
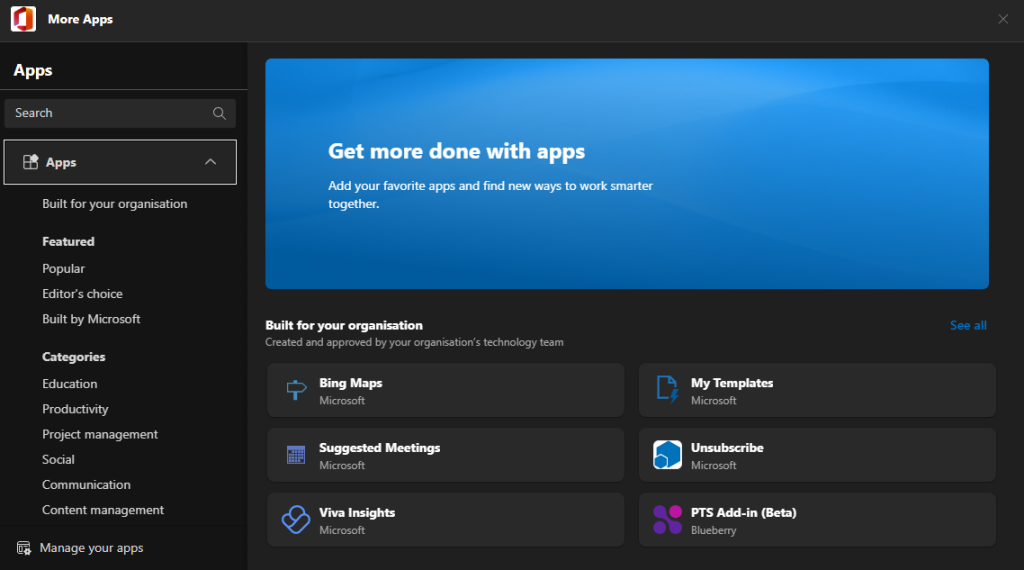
In some versions of Outlook for Windows, the add-ins option is under Home > All Apps or Home > Store. The resulting page may also be visually different.
IF USING OUTLOOK ON THE WEB
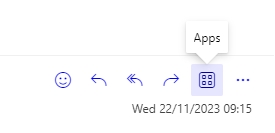
In some versions of Outlook on the Web, the add-ins option is called Apps and is only available when reading or composing an email.
While composing an email – under the Message tab in the ribbon, looks for the Apps option. If not visible, click on the More Options button – or the ellipsis button (…) – and then select Apps from the list. Next, in the overlay dialog that pops up, click on the Add apps button. You will be redirected to the Add-ins page.

While reading an email – click on Apps button next to the reply buttons. In the overlay dialog that pops up, click on the Add apps button. You will be redirected to the Add-ins page.
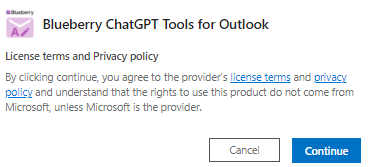
- With the Add-ins page open, type 'Blueberry ChatGPT Tools' into the search bar. Once you have found the add-in, press the Add button. You will be prompted to accept Blueberry's Terms and Conditions of Use. Provided that you are happy to proceed, press the Continue button. The add-in will then be installed.
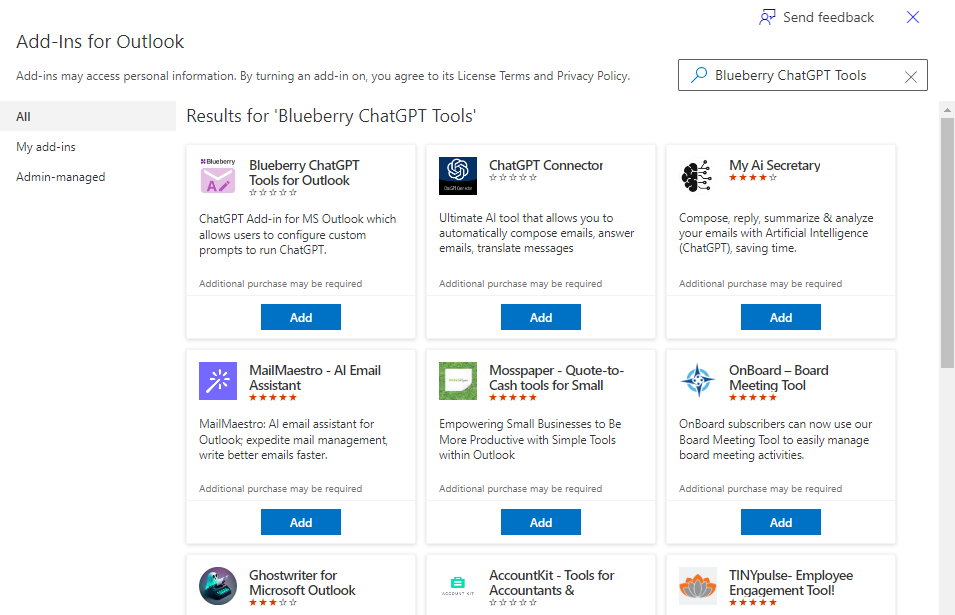
-
Close the Add-ins page.
If you are using Outlook's desktop client, you may need to restart the app.
Once installed, the add-in will be available across all your Outlook clients e.g. you will also see it if you use Outlook in your web browser.
Note – if you are using the new Outlook for Windows and have set up multiple accounts, add-ins will only work on your primary account. This is currently a limitation of the new Outlook.
- To open the add-in:
IF USING OLD OUTLOOK FOR WINDOWS OR MAC
The add-in will be available under the Home tab in the ribbon. If the Simplified Ribbon is configured, press the ellipsis button (…) from the ribbon, and then select the Blueberry ChatGPT Tools add-in from the list.
Note – the add-in may only be clickable as you start reading or composing an email.
Also, this support assumes that the Reading Pane in Outlook is set to Right or Bottom by selecting View > Reading Pane.
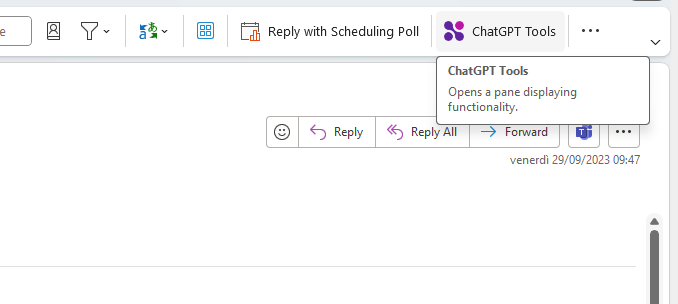
IF USING NEW OUTLOOK FOR WINDOWS OR OUTLOOK ON THE WEB
The add-in will only be available when reading or composing an email.
While composing an email – from the ribbon, navigate to Message > Blueberry ChatGPT Tools or Message > Apps > Blueberry ChatGPT Tools. If not visible, click on the More Options button – or the ellipsis button (…) – and then select the ChatGPT add-in from the list.

While reading an email – click on the ellipsis button (…) next to the reply buttons. This will display a list of options: click on the Blueberry ChatGPT Tools option to open the add-in.
Alternatively, in some versions of Outlook on the Web, the add-in will be located under the Apps button next to the reply buttons.
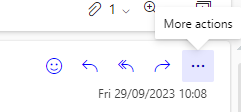

- You should now see the ChatGPT add-in in a right-hand panel. You will be greeted by the first of some screens that will help you quickly get up and running. Click the Get started button.
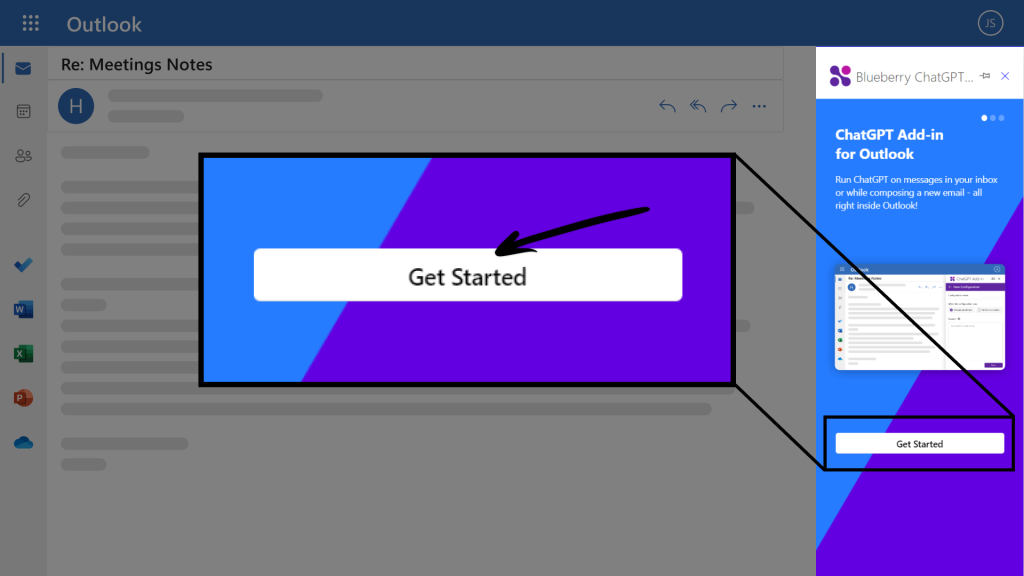
-
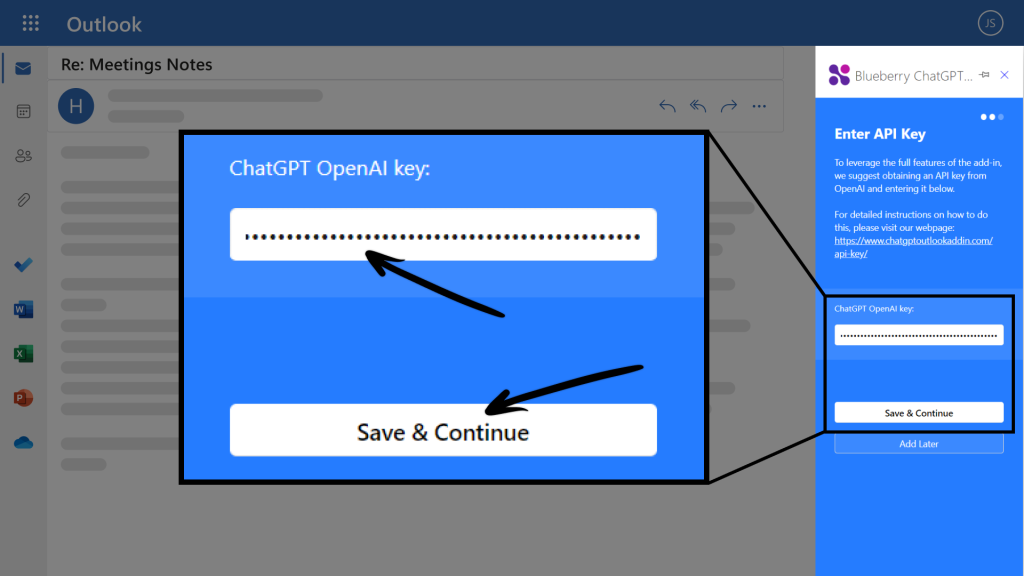
The next screen will ask you for your API key.
Whilst the add-in is free, you’ll need to add an OpenAI API account key if you want to use the ChatGPT features. Otherwise, the account is not required for some basic email read mode functionality and so can be skipped. To add, paste the API key into the text box. Then, press Save & Continue.
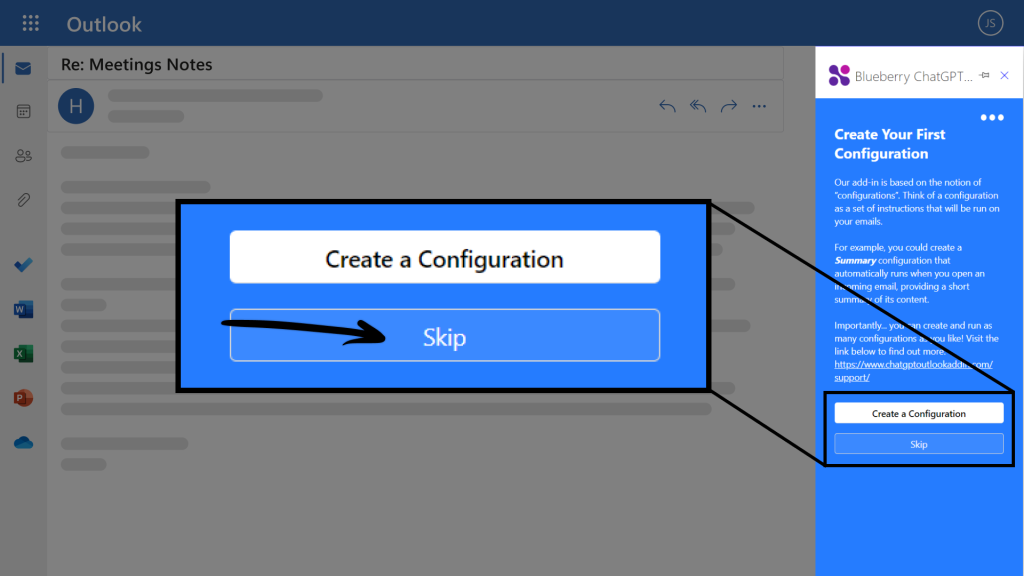
- The third screen invites you to start creating some configurations. You can either press Create a Configuration to add your first configuration, or alternatively press Skip to do this later.
Creating a Configuration
EXAMPLE CONFIGURATION: ‘SUMMARISE’
Let’s now take a look at how to create configurations. In this example, we will set up a configuration that provides a short summary of the email content, namely ‘Summarise’. The configuration will run upon clicking on its associated button.
-
To start with, click the Add configuration button on the homepage, just below all the configuration-specific buttons. This will take you to the 'New configuration' page.
Note that if there are too many configuration-specific buttons on the page, the option will be hidden in the overflow area. If that is the case, click Show more to expand the overflow area, then click Add configuration.
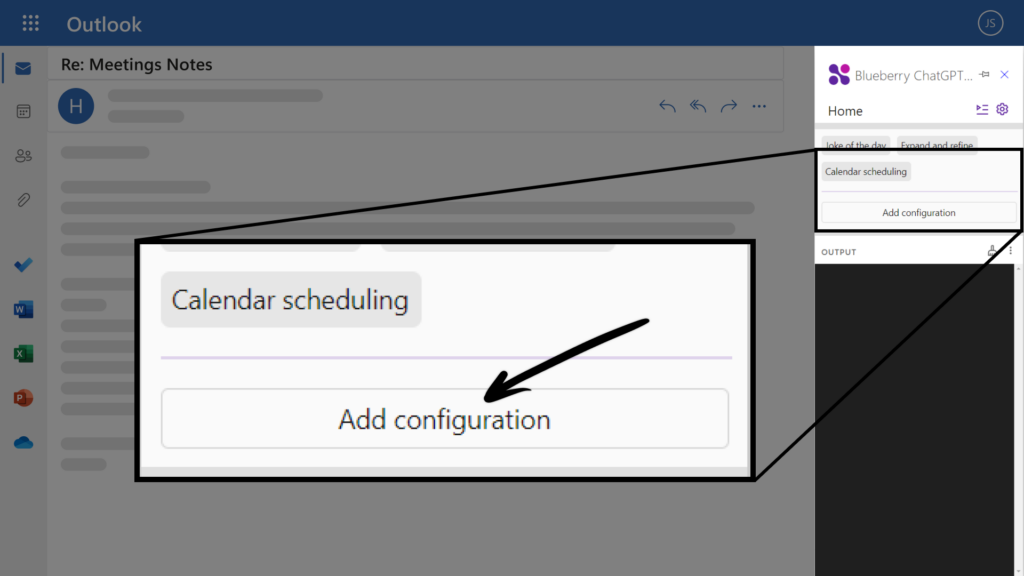
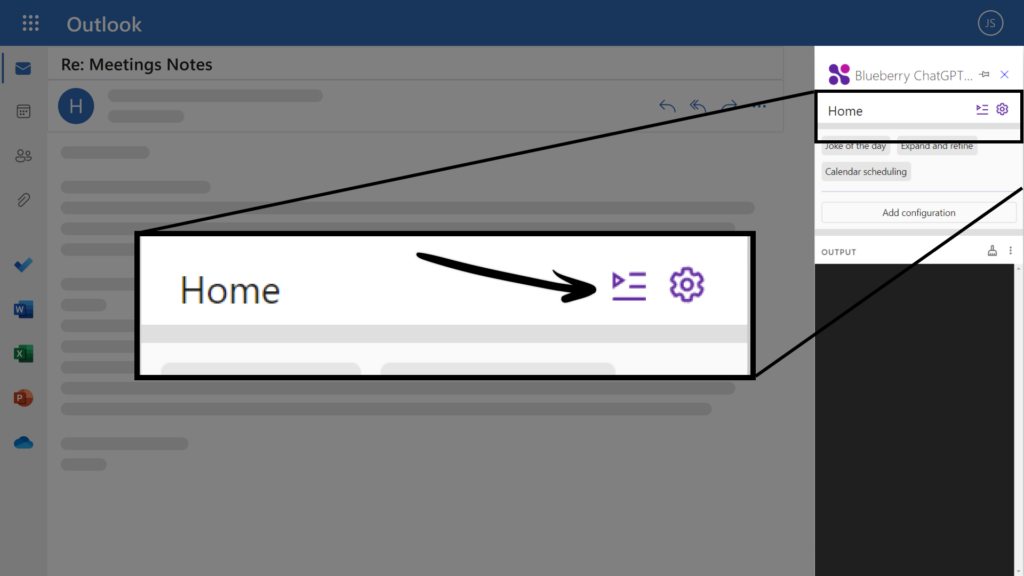
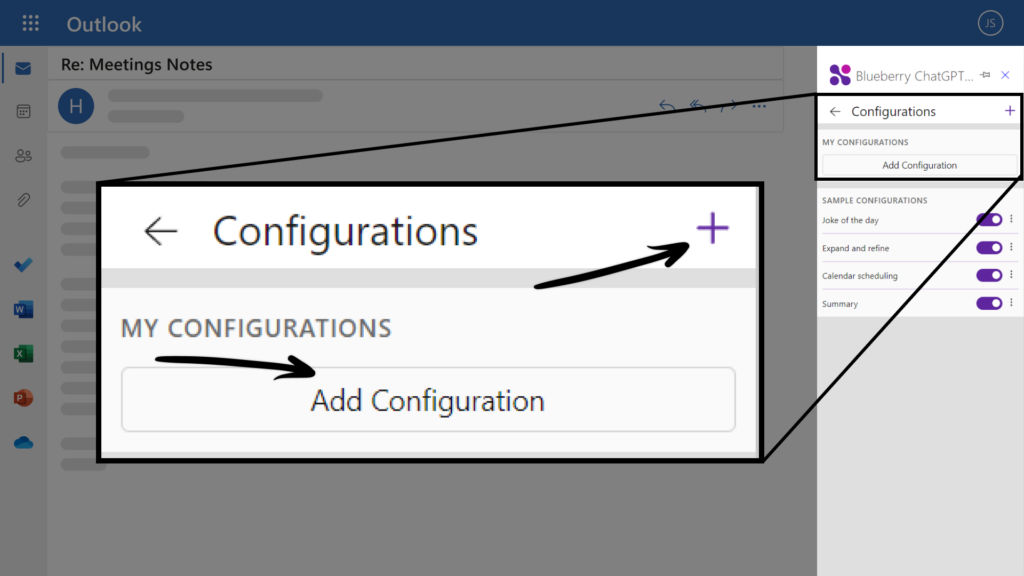
Alternatively, you can also create a new configuration from the ‘Configurations’ page. To do so, click on the Configurations icon next to settings. You will then see a list of all your configurations.
Next, click the plus icon in the top-right corner – or the Add configuration button under the MY CONFIGURATIONS section.
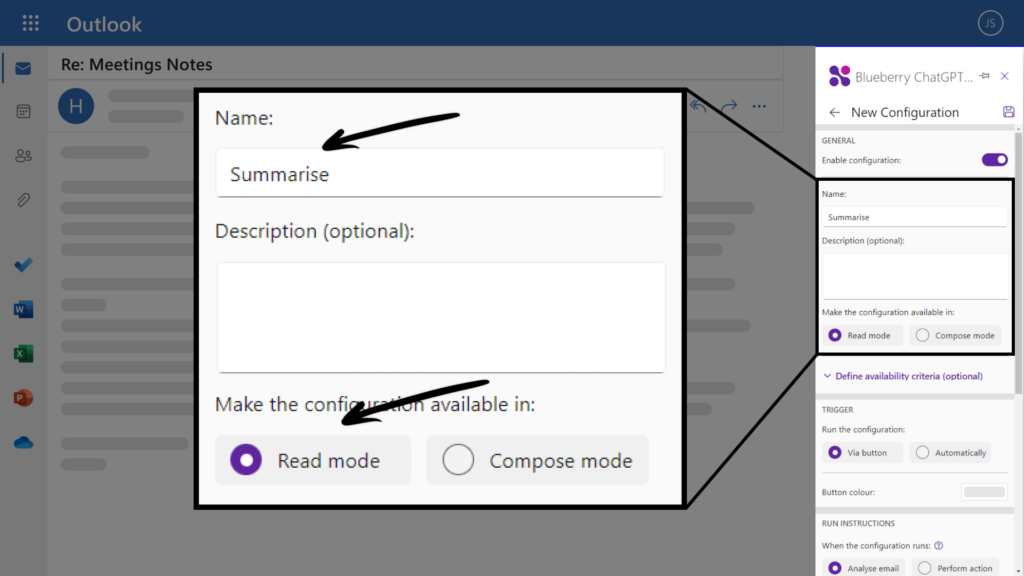
- You should now see all settings for the new configuration. Let's start by naming the configuration. Enter 'Summarise' in the name field. Then, since we want to summarise viewed emails, set the configuration to run in Read mode.
- Optionally, you can also set some criteria defining when the configuration will run or when it will be shown. To do so, press Define availability criteria (optional). This will reveal three checkboxes:
• ‘Sender email’: if you want the configuration to only work for emails from a specific sender, enter their email address in this field. You can also enter multiple email addresses, separated by commas.
• ‘Recipient email’: if you want to apply the configuration only to incoming emails, enter your email address in this field.
• ‘Body text’: if you want to apply the configuration only to emails containing certain words/phrases, populate this field.
In this example, we will leave the availability criteria fields empty, so the configuration runs against all viewed emails.
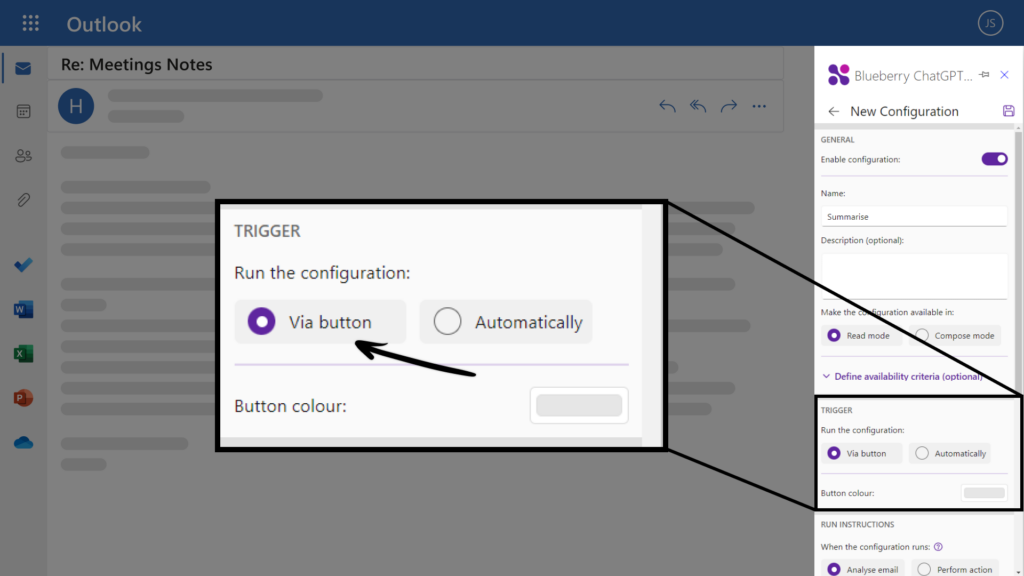
- We now need to define whether the configuration will run automatically or whether it will be triggered manually via a button. Under the TRIGGER section, set the configuration to run Via button.
-
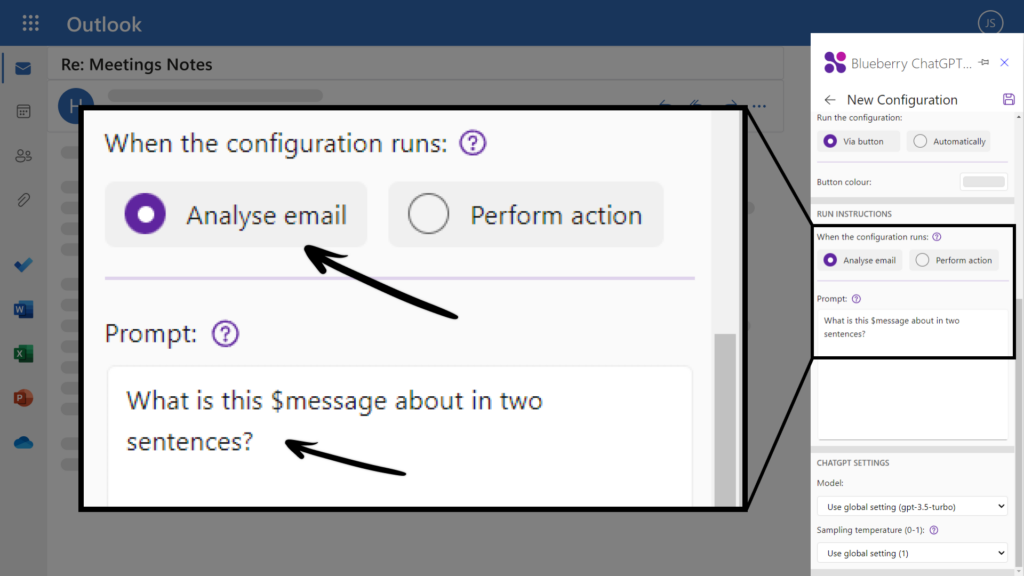
Next, since we want the new configuration to just process the email text and give a written response, choose Analyse email under the RUN INSTRUCTIONS section. Note: if you wanted a certain action to be performed based on the text/topic of the message (which is not the case for the 'Summarise' configuration), then you would select Perform action instead; this would open up more options – such as categorise the email, flag it, move it to a specific folder, or send it to spam.
Then, we need to explain to ChatGPT what exactly we want it to do. This can be done in the ‘Prompt’ field. You need to use the following syntax (don't worry, it's simple enough!):
• ‘$subject’ (if prompt relates to the subject of the email).
• ‘$reply’ (if prompt relates to the part of the message up to the ‘From’ line).
• ‘$message’ (if prompt refers to the entire text of a message).
For the “Summarise” configuration, write the following prompt: ‘What is this $message about in two sentences?’.
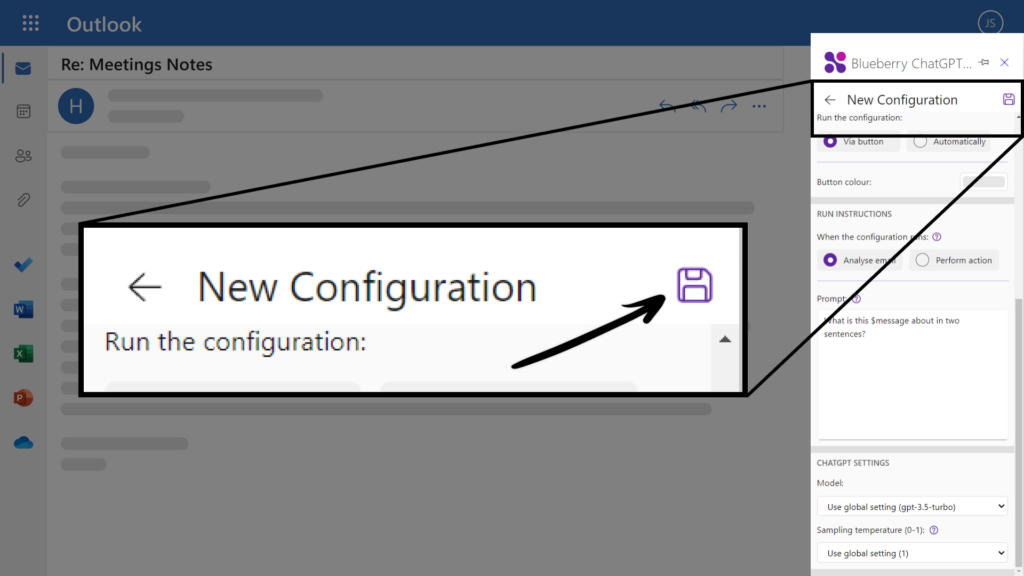
- Finally, press the Save icon.
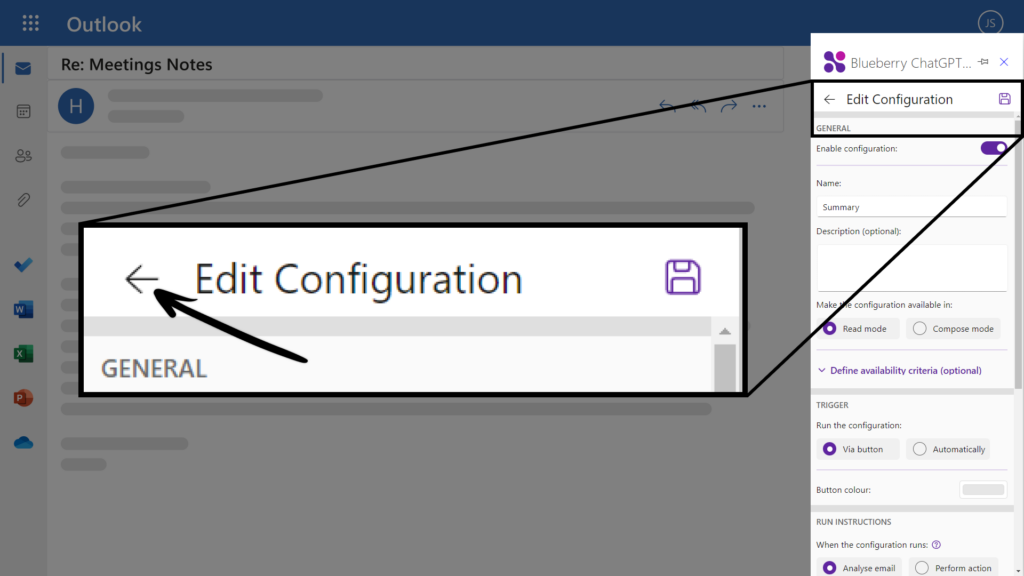
- Now, you may want to try out your new configuration. Navigate back to the homepage by pressing the Back arrow next to title ‘Edit Configuration’.
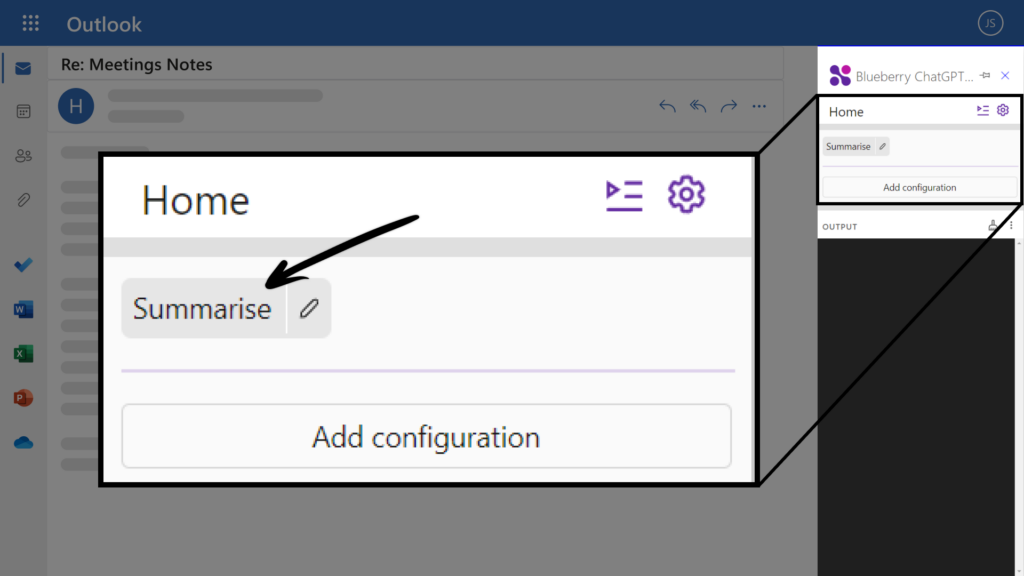
- In your inbox, click on a received email. Then press the Summarise button.
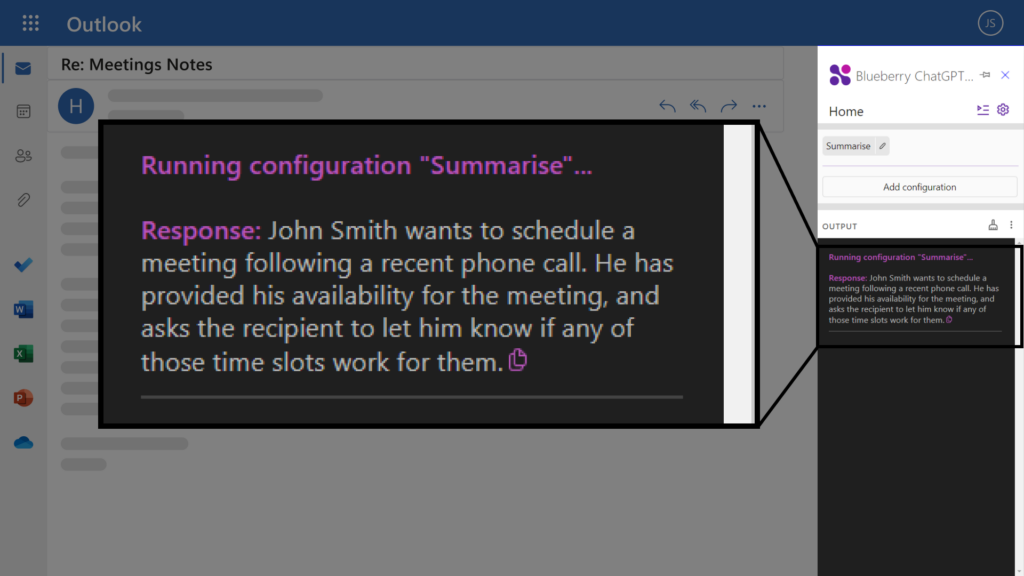
- The summary of the email will be displayed in the Add-in panel.
We suggest you play around with the add-in configuration settings. But for little more guidance on creating configurations, you will find some screenshots of settings and some more examples below.
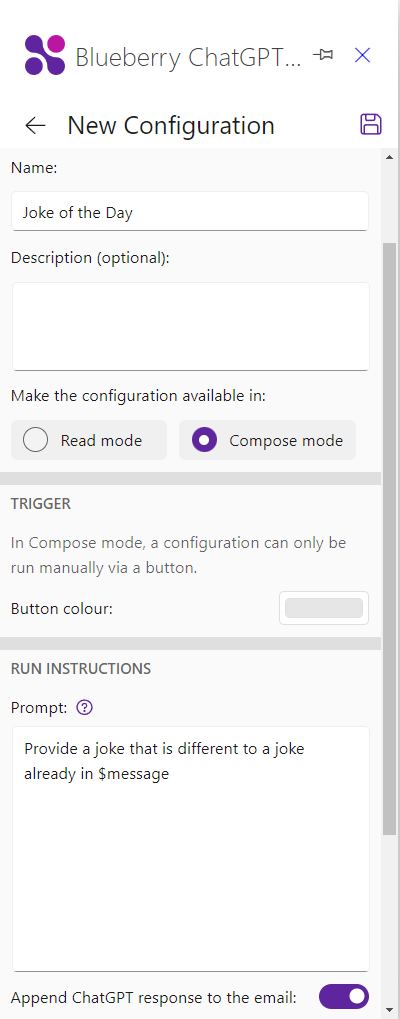
EXAMPLE CONFIGURATION: ‘JOKE OF THE DAY’ BUTTON
Configuration ‘Joke of the Day’ displays a button on the add-in’s homepage that can be used while composing a message. When the button is clicked, a joke is appended to your message!
EXAMPLE CONFIGURATION: ‘FACEBOOK’
Configuration ‘Facebook’ displays a button on the add-in’s homepage that can be used while reading a message. If the button is clicked, the configuration checks if the email contains anything about Facebook and then sets it to Blue category. Okay, this may seem quite limited but you get the idea – you can replace “Facebook” with any word!

More Prompt Ideas...
If you’d like to experiment more with the ChatGPT add-in, here are some prompt ideas for your configurations!
• Ice Breakers for Meetings: “Suggest some ice breaker questions for our team meeting.”
• Motivational Quotes: “Give me a motivational quote for my team.”
• Meeting Minutes: “Create a template for meeting minutes.”
• Calendar Scheduling: “Suggest a polite way to ask for a meeting.”
• Reminders: “Create a reminder template for an upcoming deadline.”
• Thank You Notes: “Help me write a thank you note for a job interview.”
• Polite Decline: “How can I politely decline an invitation to a meeting?”
• Onboarding Emails: “Draft a welcome email for a new team member.”
• Meeting Follow-ups: “Draft a follow-up email after a meeting.”
• Team Building Activities: “Suggest some virtual team-building activities.”
• Status Updates: “Create a template for a weekly status update.”
Removing the Add-in
- Open Outlook and look for the Add-ins page. To do so, click on option Home > Get Add-Ins from the ribbon. If the Simplified Ribbon is configured in your Outlook client, select the ellipsis button (...) from the ribbon, and then choose Get Add-ins.


Note – the option may not be visible until you start reading an email.

- On the Add-ins page, navigate to the My add-ins tab. Then locate the Blueberry ChatGPT Tools add-in, click the ellipsis button (...) next to it, and select Remove.
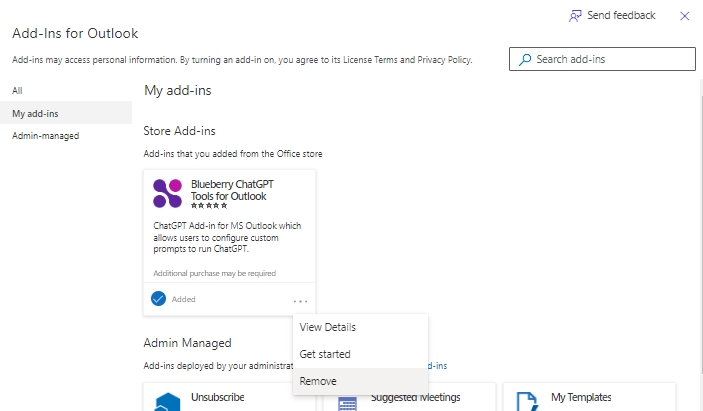
If you are having trouble finding the Add-ins page, you can follow the platform-specific instructions below:
IF USING OUTLOOK FOR WINDOWS
In some versions of Outlook for Windows, the add-ins option is located under Home > All Apps or Home > Store.

Upon clicking on it, the Add-ins page will pop-up. From this page, click on Manage your apps. Then locate the Blueberry ChatGPT Tools add-in, click the ellipsis button (…) next to it, and select Remove.

IF USING OUTLOOK ON THE WEB
In some version of Outlook on the Web, the add-ins option is called Apps and is only available when reading or composing an email.
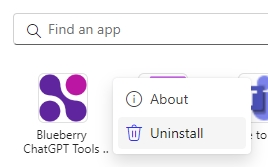
While composing an email – under the Message tab in the ribbon, looks for the Apps option. If not visible, click on the More Options button – or the ellipsis button (…) – and then select Apps from the list. An overlay dialog will pop up. In the overlay dialog, locate the Blueberry ChatGPT Tools add-in, right-click on it, and then select Uninstall.

While reading an email – click on Apps button next to the reply buttons. In the overlay dialog that pops up, locate the Blueberry ChatGPT Tools add-in, right-click on it, and then select Uninstall.

